

The answer is certainly “YES”. Although it might have been a complicated and challenging project, install an irrigation system can totally be within your reach if you have enough patience, time, and knowledge with the right materials and applications to finish it on your own.
The greatest way to water your lush lawn by building a sprinkler system is not far from gardeners’ knowledge. An underground water supply system offers a wonderful and convenient way to supply water directly for your lawn garden without wasting too much water, or leaving any grass area dried. A DIY sprinkler can save you a great amount of water and money in irrigation and labor costs.

However, saying is always easier than doing. There is no certain reliability that you get enough know-how and skills on such a challenging project. Some people prefer to hire a professional for their sprinkler installation than construct themselves to avoid unwanted problems that cost much more money. This article will figure out whether you’re ready for this challenge or you should find an expert, as well as the costs of both two ways for your reference.
Table of Contents
- What to Consider Before Sprinkler System Installation
- Learn Your Water Supply
- Map the Irrigation System
- Gather Primary Parts of Your Sprinkler System
- Install a Sprinkler System Step by Step
- Cost Factors of Sprinkler Installation
- The Real Costs to Install a Sprinkler
- Cost of Installing Sprinkler System Yourself
- Cost of Underground Sprinkler System
- Automatic Sprinkler System Cost
- Irrigation System Cost
- Hiring a Professional of Installing Your Sprinkler Systems
- Maintenance and Control Your System
I. What to Consider Before Sprinkler System Installation
Before all, you need to ensure that whether your local building department gives any permission to you for your DIY sprinkler systems. Research all building watering rules or principles that your state requires and of course, you won’t be allowed to get started until having a permit. To avoid the situation that you would have disrupted the power lines or cable lines of your area by an accident while digging, remember to check the underground utilities in your local by calling 811 before you start to dig your ground up. If not, you will expect to be charged an extra fee for your unwanted accident.

Learn Your Water Supply
To buy the right supplies for your project, you need to learn the following specific information about the water supply in your home, including water pressure, water meter size, service line size, and flow rate.
WATER PRESSURE
To determine this number in PSI (pounds per square inch) at an outside faucet, you’ll need a pressure gauge. Remember to turn off the water faucets, which include both indoors and outdoors, when you reading the pressure number. And then, send the information about this number to your manufacturers with a sketch of your property to receive the right component for your sprinkler system.

WATER METER SIZE
There are two measurements: water meter size and well pump size. If your water source comes from a municipal system, you could find the size information on the meter, or on the utility bill. If it’s not there, contact your water provider for the meter size.
If you’re using a well, you’ll need to determine the size of your pump by looking at the manufacturer’s instructions.
THE SERVICE LINE SIZE
You need to detect the size of your water supply line to purchase the proper pipes for your water system by using a string. Wrap the string around your existing pipe and look up its dimensions on the Internet or send it to your sprinkler manufacturers. There are three common pipes: copper pipe, galvanized pipe, and PVC pipe.

THE FLOW RATE
The water flow rate is measured in gallons per minute (GPM). To determine this rate, you need your outside faucet and a container with measurable levels. Fill your container with your faucet and measure the water level, as well as the time it takes to fill your container in gallons by seconds.

Then, multiply the time you measured by 60 seconds. The rate you get from this is the water flow rate in GPM.
Map the Irrigation System
Once you finish preparing the preliminary parts, map your property and come up with your sprinkler system idea. The elements of your yard that need considering include slopes, fences, sidewalks, shrubs, flower beds, etc. A map is important to define the watering zones, because of these various elements in your yard. Each feature is so divergent that just one watering zone is mostly not convenient.

Remember that your map should include all your property landscapes. Make sure all the zones include the control valve, pipes, and sprinkler heads and clearly mark out where each feature, as well as the water meter, is on the map. In turn, the installed system will provide precisely adequate coverage for areas that need water supplying.
One more important point is that notice on the map as well if your lawn is sloped. The slope area in your yard will also affect the water pressure and the amount of water from the sprinkler will be under control. Once you finish sketching your map and send it to your manufacturers, they will send you a detail back. You’ll be able to go on to the next step.

Gather Primary Parts of Your Sprinkler System
When you’ve done with your planning project, bring your irrigation map along with your dimensions to buy relevant components for your irrigation system. Each system also has these primary parts: control valve, valve boxes, pipe, risers, backflow preventer, sprinkler head, timer, valve manifold.
- The control valve allows you to control (open or close) the water pipe of each zone in your garden ground.
- The valve box is to protect the valve of your sprinklers.
- Pipe: you can choose either PVC pipe (Polyvinyl pipe) or polyethylene pipe, depending on your living area, to supply water to the sprinkler heads for your system. PVC pipe is more common and stronger than the other. The polyethylene pipe is suitable for cold year-round climate areas and requires fewer fittings than PVC pipe. Both two pipes are cut by a pipe cutter or puller (only use a puller in case you’re trained on the lawn projects or better leave it for professionals).


- Type of sprinkler heads should be rated and bought followed the GPM measurement at the PSI suppliance of water you got at the beginning. You can choose the head styles depending on your yard plants and the amount of water they require.
- The use of risers is to connect the pipe with the head
- A backflow preventer is required. The backflow preventer plays as an anti-siphon device that discourages your potable water source from being polluted by the sprinkler system.
- A timer allows you to set up the automatic function of the timer system.
- Valve manifold is the main water control of a sprinkler system.

CALL US NOW FOR A FREE ESTIMATE – (206) 265-2940
II. Install a Sprinkler System Step by Step
STEP 1: MARK THE PLACE INSTALLATION
Place the flags or stakes to locate the area where you’re planning to install the lawn sprinkler heads. And then, use the strings to connect the location of lines and it’ll be the place where the pipe will be located.

STEP 2: DIGGING THE TRENCHES
To install a DIY underground sprinkler system, the hardest part that requires much effort is installing piping down the ground.
To start, follow the string you highlighted before and dig the trenches. You can use a garden spade to do it by yourself or hire a professional trencher to maintain a lot of your time. If you dig the trenches by hand, remember to start with the mainline of the water supply first, and then the sub-branches. Also notice that digging by hand in narrow spaces like flower beds is better than using tools to avoid damaging your lawn plants.
Usually, the trench needs digging quite shallow. At least 6 inches deep is required. Professionals suggest your trench should be from 8 to 12 inches deep to provide adequate space to install your underground sprinkler system and protect it from the effect of a lawn machine.

STEP 3: CONNECT ALL THE PIPES
Use a scissors-type tubing or pipe cutter to cut your pipes straight and then use a knife to clean the edges. Put the pipe into the trench, or if possible, assemble each part first before laying them into the trench. For each sprinkler, twist the pipe with fittings until they reach the correct position. Use adhesive sets to connect the pipe to the valve zone.

STEP 4: ASSEMBLE THE VALVES
First, gather the zone valves and connect them to the underground sprinkler system – like a garden hose. Remember to glue the manifold when attaching the zone valves together. For each valve, install a drain fitting and turn the water in high pressure to clear through the pipe.
STEP 5: PLUG IN THE WATER SOURCE
Once you finish assembling your pipe and valve, connect the pipe to the main water source and connect the control valve box to the irrigation supply line. Remember to turn off the water meter to save your resources and prevent the lawn yard from becoming so slimy.
In this step, you should contact an underground irrigation installation service to help you tap into the main line. Though, in case you think you can do it yourself, the following guideline is for you:
- Each valve zone requires a controlling box (just one for each). Place the control valve box into the hole that you dug before.
- Install the manifold in the valve box. It will control all the valves of each zone through one controlling system.
- After you add a PVC pipe to the backflow preventer from the water supply line, connect it to the manifold.
- From the control box to the timer, digging a trench, then install and connect the wire to wires of each valve. The timer controls which area in your yard will be watered.
- Connect the pipe to the control box. You can handle the flow of water from different valves in garden zones at once.
- Attach the risers to the fittings along with the piping. They will also be connected with the sprinkler heads in the next step.
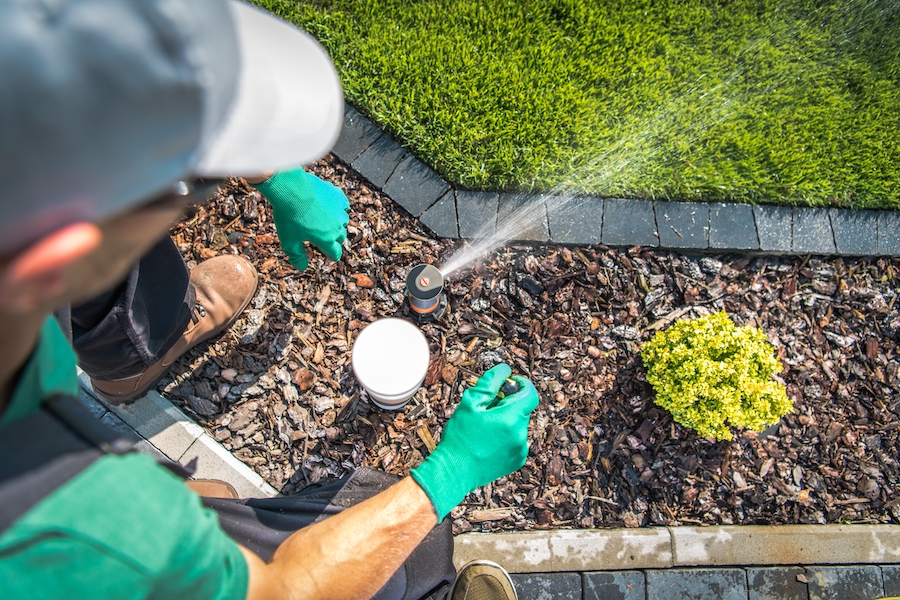
STEP 6: CONNECT THE SPRINKLER HEADS
Once you notice the pipe is already under the sprinkler, thread the sprinkler head to the riser and ensure to flush the debris among the pipeline to avoid blockages and leaks. Follow carefully the manufacturer’s instructions before the connection of its heads because each sprinkler system will be different if there are different producers.

Remember to make sure that your sprinkler heads are below the ground level for the best function.
OR FIND A PROFESSIONAL TO DO IT FOR YOU!
STEP 7: INSTALL THE BACKFLOW PREVENTER

Most states require this system to prevent chemicals in the lawn garden from causing serious problems for residential health. This establishes should be implemented right after installing the ball valves. This preventer will close the underground sprinkler system when not in use. Always make sure all the system is installed in the right way.
STEP 8: INSTALL TIMER
This system allows you to schedule the specific time to run the irrigation system, as well as the automatic close function of the system. Also, the timer controls the lawn zones of your garden which need watering. These days, there are some sensor feature systems that you can notice the water level and humidity of weather so that you will be ready for changing weather. Some areas require this sensor system as a crucial part of the water system.
STEP 9: TEST RUN AND CONTROL THE IRRIGATION SYSTEM
Once finished all the work above, you should make a test run on your system. Read the instructions and connect the wires of the zone valve. Set up the time to run the systems automatically to check the timer and examine whether the lawn area is watered thoroughly and receives an adequate amount.
III. Cost Factors of Sprinkler Installation
There are many factors that affect the cost if you want to install a sprinkler system, and these things below are the main factors, which affect the cost to install a sprinkler system:
The lawn size
This is the most evident factor affecting the typical cost of a sprinkler system. The overall acreage of your property’s watering area will decide the number of materials required, such as PVC pipe, polyethylene pipe, and sprinkler head. Simply, the more grass that has to be watered, the more materials we’ll need to install.

Zone
A yard may be divided into zones with varying irrigation requirements. Sprinkler systems may be programmed to water various zones at different times of the day or with varying quantities of watering. You may have distinct zones for lawns, gardens, and plants depending on what’s in your yard.
Types of sprinkler heads
The type of sprinkler head necessary to properly maintain your water coverage on your landscape will also have an impact on the overall sprinkler cost for your home system.
IV. The Real Costs to Install a Sprinkler
The costs to install sprinklers vary based on the size and form of the lot, water pressure, the number of landscaping beds existing, and the quantity and size of the head. A smaller yard needs a smaller head that is closer together, whereas a larger yard necessitates a larger head that sprays farther.

A typical suburban yard is roughly a quarter-acre in size, and sprinkler systems cost between $2,500 and $3,500 to install. The average cost varies from $3,500 to $5,500 for a half-acre lawn and $6,000 to $10,000 for a one-acre garden.
Feel free to contact us at info@greenarborlandscaping.com
Or call us today at (206) 265-2940
Cost of Installing Sprinkler System Yourself
Installing a lawn sprinkler system yourself may save you a lot of money. If you opt to do it yourself, make sure you have the required abilities and time to accomplish the project. You’ll also need to spend money on tools and equipment.
You may maintain hundreds of dollars by installing your DIY sprinkler system yourself. However, keep in mind that this project is time-consuming and takes a high level of talent to complete. If you’ve taken care of it, go for it. The DIY installer should budget the average amount between $1,500 and $2,000 to install the device.

Before installing work begins, you will typically spend $800 of the overall project cost on planning, inspections, permits, and the preventer device, which prevents water from running in reverse.
Cost of Underground Sprinkler System
Some homeowners choose to keep their sprinkler systems hidden below to give their landscape a clean, smooth appearance. To finish the project, you’ll need to dig a trench, which generally costs $400 to $1,200, or $4 to $12 for every linear square foot to hire a digger. You may be able to decrease expenditures in half if you can do it yourself. In another way, hiring a local excavation firm near you is an excellent method to complete the work quickly.

An underground sprinkler system will cost between $1,740 and $3,410 for a quarter-acre lawn. The price rises in direct proportion to the size of the lawn.
Underground sprinkler systems are often automated, and the entire cost includes a panel and timer.
Irrigation System Cost
Drip irrigation systems use above-ground drip lines and are usually more efficient than sprinkler systems, making them an excellent alternative for people with big lawns or gardens that demand a lot of watering. A drip sprinkler system will cost between $1,800 and $2,500 per acre.
Drip irrigation systems for residential lawns are often put a few inches below the ground, so you won’t have to keep an eye out for it while mowing or running about the yard. However, because establishing this sort of sprinkler system requires a lot of digging, it’s preferable to do it before planting your grass.
V. Hiring a Professional of Installing Your Sprinkler Systems
As we discussed from the beginning, installing a sprinkler system is a challenging project that requires a lot of effort, skills, and time. If you’re not ready for being responsible for all the faults during the process, contact an expert to help you in this field. Though it costs more expensive than doing yourself, it provides fewer risks than that.
To begin to choose a professional, remember to ask them for the certifications and permits to avoid unwanted results.
Contact us to have a free estimate for you before beginning.
Green Arbor Landscaping is a full-service, 35 years experienced landscaping company serving customers. We inform you confidently that we will provide you with professional landscaping services in the area. All our laborers are required ongoing training to maintain their licenses with hands-on experience at the top level.

Here are some reviews from our clients:
“We were having a hard time finding someone to do some work for us. It was a relatively small area that needed to be leveled out and we didn’t have the equipment to do it ourselves. We reached out to four different companies and either the price was astronomical, they were too busy with other larger projects to do ours, or they just never showed up. Green Arbor Landscaping & Maintenance responded to our request a within a few days and had someone out here to give an estimate within a week. They were very kind had no problem taking on the job and the price was very reasonable. They did great work and we will definitely be using them again!” – Izzy Gaming

“I couldn’t be more satisfied with the results. Green Arbor Landscaping & Maintenance is meticulous about the details, and he has great vision about how all the elements must work together. Green Arbor Landscaping & Maintenance took an extra day to finish the work, because the complexity was more difficult than anticipated. Other landscapers would have rushed to finish, to the detriment of a quality job. We were so pleased, we had Green Arbor Landscaping & Maintenance perform a similar clean up for the house we were selling. Same great results! Now we have Green Arbor Landscaping & Maintenance coming back to maintain the great look. Our new neighbors say the house never looked so good!” – Collin Thompson
Here is some information you might need:
- Phone: (206) 265-2940
- Email: info@greenarborlandscaping.com
- Website: https://greenarborlandscaping.com/